ВНИМАНИЕ!
Споделената информацията не претендира да е изчерпателна, нито точна към днешна дата! Тя не е юридически или счетоводен съвет! Отнася се само когато купувачът е физическо лице, без регистрация по ДДС, което купува автомобила за лични нужди!
Това което следва долу е по-скоро литературен пътепис, отколкото научен доклад или професионален съвет.
Предговор
От няколко години в българския Интернет се разпространява, че ако искате да си купите нова Tesla, това можете да направите само от Австрия и Германия, които били единствените “държави за експорт” в Европейския съюз. Това звучи меко казано странно, тъй като в Европейския съюз всички граждани на ЕС следва да се третират еднакво, или с други думи – това би било дискриминация, ако отидете в Tesla Гърция и там откажат да Ви продадат кола, само защото сте с българско гражданство, а биха продали без проблем на гръцки гражданин. Оказа се, че това което се разпространява в Интернет не е съвсем така.
Оказа се, че е напълно възможно да си купиш нова, налична Tesla от шоурума в Букурещ! Не, процесът не е толкова прост, като да отидеш да си купиш кола от друга марка от дилърството в твоя град, но не и коренно по-различен, от това да я купиш от Австрия или Германия. Тук ще се опитам да споделя и да систематизирам това което ми е известно.
Преди да започнем историята, едно напомняне: ВИНАГИ ЧЕТЕТЕ ДОГОВОРИТЕ!
В договорите за покупко-продажба на Tesla има клауза, която Ви забранява да препродавате автомобила в следващите 6 месеца от датата на доставката! Пиша това, тъй като някои лизингови дружества очакват от Вас да закупите автомобила и след това да им го продадете, а те на свой ред да Ви го лизинговат. Същото важи и ако купите автомобила на фирма и след това го препродадете без да са изминали тези 6 месеца! Консултирайте се с адвокат за да сте информирани за рисковете, които съществуват, ако нямате намерение да придобиете автомобила директно на Ваше име!
Какво трябва да си осигурите
- Сумата за покупка на желания от Вас автомобил
- Сумата за да платите ДДС в България (повече за това по-надолу).
- Банкова карта, която е активирана за плащания в Интернет, за да платите депозита.
- Транспорт на автомобила – платформа, автовоз и т.н..
- Гараж с контакт, където при нужда колата да остане за не по-малко от месец
- Румънски леи за таксата на “Дунав мост” при връщане и ако изникнат разходи.
Какви изненади Ви очакват?
- Може да получите колата с много нисък заряд
- Може да вземете колата, но документите, които са Ви нужни за регистрация още да не са пристигнали и да трябва да чакате да пристигнат в Букурещ и след това да отидете да ги вземете или да Ви ги пратят.
- Тесла Румъния може да Ви откажат да Ви възстановят ДДС-то – не се шокирайте, възстановяват го, просто се изисква малко повече натиск!
- И вероятно много други, за които за момента не знам и не мога да споделя.
Поръчка
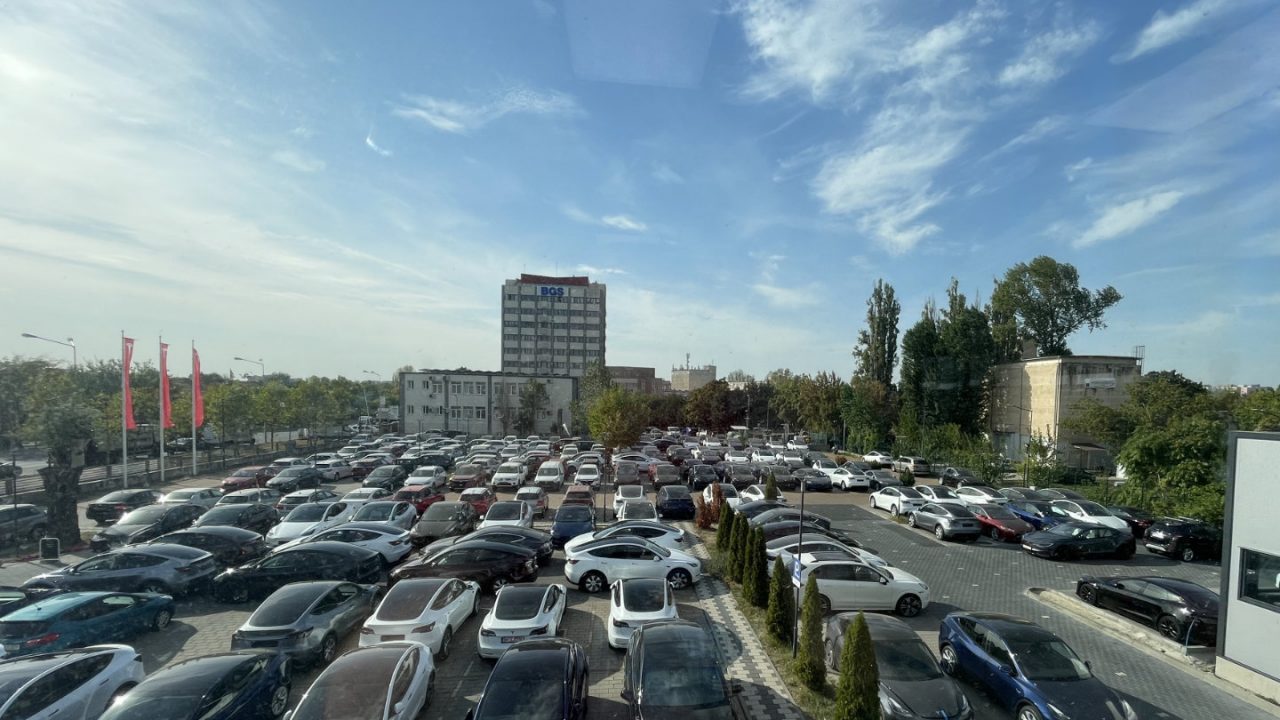
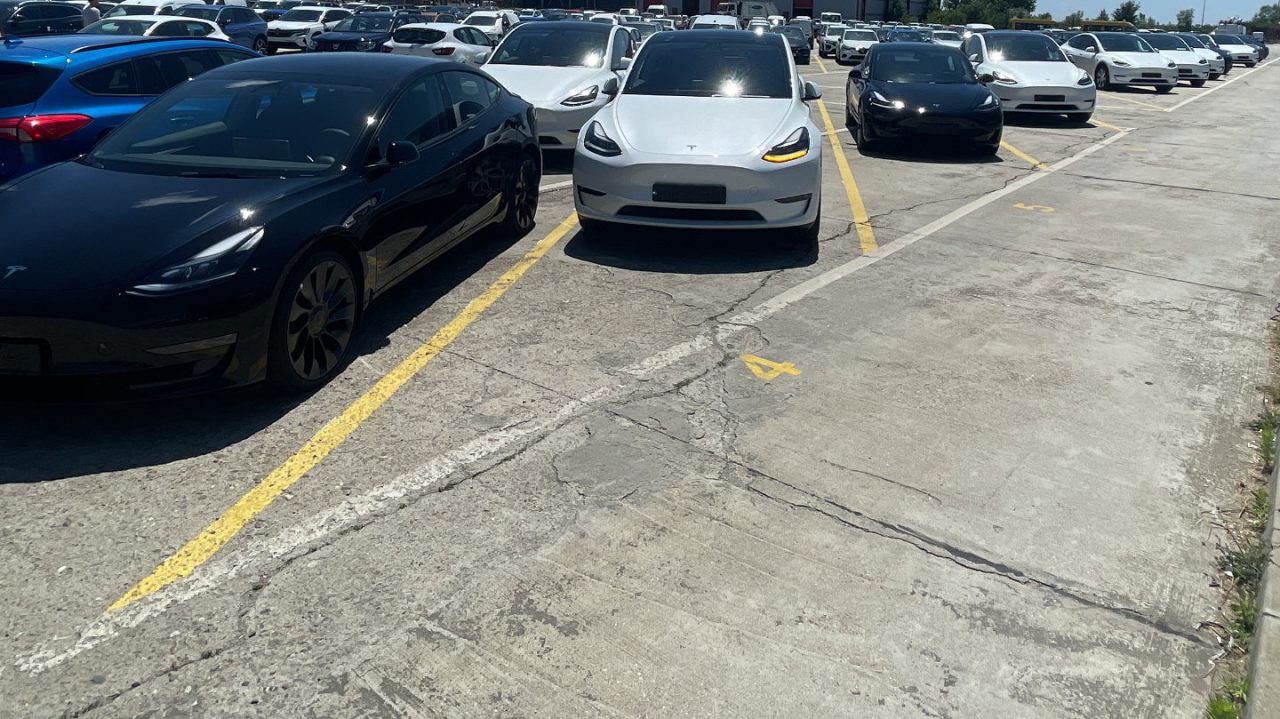
Най-лесният вариант да поръчате, е като отидете на място в шоурума на Tesla в Букурещ. На място може да поговорите с хората от отдел “продажби” в Tesla и да Ви помогнат през мобилния си телефон да направите поръчката, и да платите капарото. Добре е да отидете на място, защото за конкретния случай, който съм описал, се оказа, че това което е качено като наличност на сайта, всъщност не са всички налични автомобили! Тези, които бяха с най-промоционални цени изобщо ги нямаше качени на сайта!
Не забравяйте да попитате и дали могат да Ви издадат фактура без ДДС, както и да попълните декларация, за това, че възнамерявате незабавно да изнесете автомобила извън Румъния и да го регистрирате в България! Вероятно вече имат познания по темата :)
Ако Ви издадат фактура без ДДС, то Вие все пак ще трябва да преведете цялата сума, като размерът на ДДС ще остане като гаранция, че Вие ще внесете ДДС в България и ще им пратите необходимите документи – товарителници, регистрационни талони, удостоверение, че сте внесли ДДС в България и т.н..
Може обаче да Ви издадат фактура с 19% ДДС, колкото е ДДС в Румъния. Какво трябва да направите в този случай съм описал малко по-надолу
Защо трябва да плащате ДДС два пъти? Всеки който се интересува от покупката на Tesla е запознат с тази особеност, която е характерна за покупката на нов автомобил от физическо .лице от друга държава-членка на ЕС.
Плащане на капаро
Плащането става през браузъра на мобилния Ви телефон. На място в шоурума има безплатен Wi-Fi, през който можете да направите поръчката. Това е от полза, тъй като не винаги може да се добави карта в приложението на Tesla от България. Освен това, може да се наложи да Ви преместят акаунта от “other Europe” в Румъния. Като част от поръчката от Вас се изисква да заснемете и качите копие на лична карта / паспорт.
Капарото е в размер на около 250 Евро, плащате го в Румънски леи през банковата карта, която трябва да добавите в Tesla акаунта си. Обменният курс се определя от банката издател на картата.
Плащане на остатъка от цената
Остатъка от цената трябва да платите по банков път. Той също е дължим в Румънски леи! Заради това имайте предвид следното:
- Банковият трансфер не е мигновен, както плащанията към ЕС в Евро. Той трябва да се нареди през SWIFT!
- Проверете ПРЕДВАРИТЕЛНО с банката Ви курса на който ще Ви обменят сумата, както и как трябва да направите превода – онлайн, на гише, както и дали можете да договорите обменен курс.
- Проверете ПРЕДВАРИТЕЛНО с банката Ви какви ще са таксите за превода – SWIFT преводите са скъпи, и може да достигнат до 1000 лева, за по-скъпите автомобили.
- Имайте предвид, че при SWIFT преводите можете да изберете коя страна да поеме разноските по превода и на изпращача на превода и на получателя!
След поръчката и плащане на капарото с картата ще Ви разпечатат проформа фактура за остатъка от цената, в която има банковата сметка, както и сумата на трансфера.
Тук е моментът да коментирате с продавача кога ще можете да си вземете колата, за да може да организирате и транспорта.
Направете превода на остатъка от цената
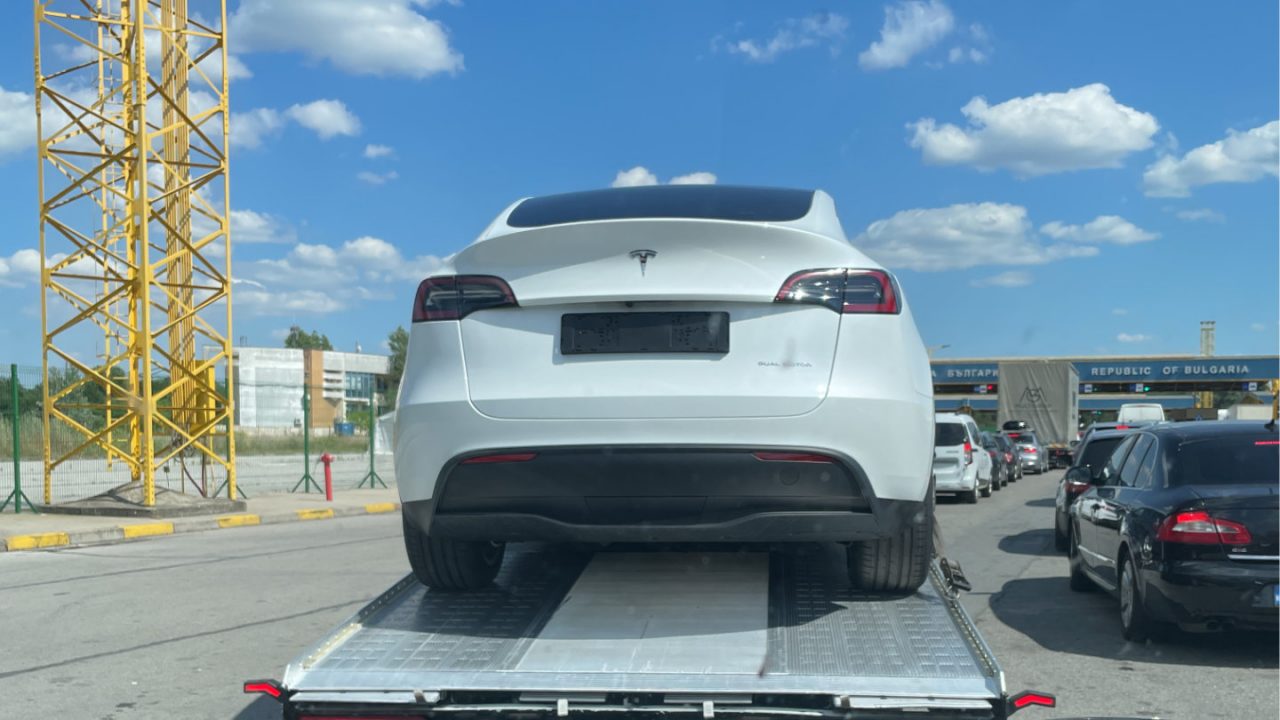
Транспорт на автомобила до България
В Румъния има транзитни номера, които може да вземете само срещу документ за самоличност и да ги поставите на всяка кола, която е Ваша собственост. Тях не можете да използвате. Те се издават само на румънски граждани и фирми регистрирани в Румъния. Освен това не са валидни извън територията на Румъния!
За да си извадите български транзитни номера Ви трябват документ за собственост, и “документ за произход”. Първото е фактурата, която ще получите от Тесла, след плащане на цялата цена на автомобила, второто в конкретния случай, според ГД “Национална полиция” към МВР (т.е. КАТ!) – само и единствено “сертификат за съответствие”, макар това изобщо да не съответства на написаното в закона. Отделно, съгласно наредбата, новите автомобили могат да ползват транзитни табели единствено при придвижване в България! Т.е. варианта за използване на транзитни табели и прибиране на ход – отпада! Поради това Ви трябва автовоз, на който да натоварите колата и да я приберете в България.
Регистрация на автомобила
Имайте предвид, че съгласно българското законодателство физическите лица следва да регистрират автомобила до един месец от придобиването му!
Ако сте роден под щастлива звезда Вие ще получите два документа заедно с автомобила си – Сертификат за съответствие (Certificate of Conformity) – на английски – и Идентификационна карта за превозно средство (Carte de identitate a vehicululului) – на румънския. Вторият документ привидно не Ви трябва да регистрирате колата, но е много полезно да го носите със себе си при регистрацията. Тъй като електромобилите, и по-специално Тесла, нямат номер на двигател, в някои звена “Регистрация” към “Пътна полиция” (а може би всички?) започва едно тюхкане и неимоверното желание да качат колата на канала и да я разглобят, за да видят номера на двигателя, който всъщност липсва. В Идентификационната карта за превозно средство, за разлика от Сертификата за съответствие, обаче е ясно написано (на румънски), че автомобилът няма номер на двигател! Което може да Ви спести бая висене на канала, който новите автомобили по принцип не следва да посещават!
Няма да навлизам в детайли какви допълнителни документи и действия трябват за да регистрирате автомобила, тъй считам, че това е извън обхвата на покупката.
Плащане на дължимия ДДС в България
Тъй като процедурата, която съм описал е за физическо лице – купувач, което няма ДДС регистрация, най-вероятно ще Ви издадат фактура с ДДС в размер на 19%, каквато е ставката в Румъния, или ако са си обновили практиките – фактура без ДДС, и друга фактура в размер на ДДС, като гаранция. Нали при поръчката не сте забравили да попитате дали има възможност да Ви издадат фактура за автомобила без ДДС и втора – за гаранция в размера на ДДС?
Трябва да подадете декларация до ТД на НАП (т.е. данъчното) по Вашия постоянен адрес, в която да предоставите данни за автомобила и копие на фактурата. Внимавайте! Сроковете за подаване на тази декларация са кратки, като могат да са дори до 14 дни, от покупката на колата, ако фактурата Ви я издадат в последния ден от месеца! Тъй като това е доста специфична тема, Ви съветвам да се обърнете към счетоводител/адвокат, който не минава за първи път през тази процедура! Декларацията не е сложна за попълване, и може да се подаде изцяло електронно, ако имате електронен подпис (вероятно и ПИК от НАП) през Средата за сигурно електронно връчване. Можете и да я попълните на хартия и да я подадете и на място в съответния офис/териториална дирекция на НАП.
Възстановяване на ДДС от Tesla Румъния
Ще трябва да съберете минимум следните документи:
- Малък и голям регистрационен талон на колата
- Копие на личната Ви карта
- Декларация, която ще получите или вече сте получили от Tesla, в която да посочите как ще транспортирате колата до България
- Удостоверение от НАП, че сте внесли ДДС за автомобила в България
Последният документ е разновидност на “Удостоверение за наличие или липса на задължения”. Най-добре е да отидете в местния офис/ТД на НАП и да им обясните какъв документ Ви трябва, с какво съдържание и за каква цел – а именно за да удостоверите пред продавача (Tesla Romania), че сте внесли дължимия ДДС в България, за да Ви възстановят данъка внесен/задържан в Румъния. Поискайте към удостоверението да приложат и заверено копие от подадената от Вас декларация. Когато получите документа – отнема до 7 дни, ако поискате да го получите електронно, трябва да го преведете на английски.
След като съберете документите ги изпращате на лицето с което си кореспондирате от Tesla, и чакате! Ако минат повече от месец и половина-два – пуснете един напомнящ мейл. Когато процедурата е приключена и парите са наредени от страна на Tesla, трябва да получите мейл от човека с когото си кореспондирате. Имайте наум, че превода, пак ще мине през SWIFT, и това може да отнеме десет и повече дни!
Преди да продължите да прочетете по-надолу, следва да имате едно на ум, че най-вероятно информацията по-надолу няма да Ви е необходима, и ще получите пълно съдействие от Tesla. Ако обаче не е така – четете!
Първоначално хората в Tesla твърдяха, че не могат да възстановят ДДС-то, и трябва човек да си го търси от румънската държава. Това се оказа невъзможно.В Румъния можете да възстановите ДДС при износ, но тъй като колата се регистрира в България, това не е износ, а вътреобщностна доставка/придобиване! В Румънското законодателство липсва процедура по която Вие да си възстановите недължимо внесения данък, който сте превели на Tesla Румъния!
БЕЗ ПАНИКА!
Ако попаднете в тази ситуация пишете на официалния мейл Tesla. Вероятно няма да Ви отговорят, поне в началото :) Следва да отправите запитване по електронната форма към румънската данъчна служба, каква е процедурата те да Ви възстановят недължимо внесеното ДДС.
Формата е налична само на румънски, но винаги може да ползвате браузър с вграден преводач. Посочете реален адрес, както и че се намирате извън страната. В запитването опишете случая, както и че не получавате съдействие от продавача. Добре е да прикачите фактурата, платежното с което сте превели ДДС в България, декларацията, документите за транспорта на колата до България, копия на талони и каквито други документи имате с които да докажете, че автомобилът е регистриран в България, и сте внесли дължимото ДДС в България. От румънската данъчна служба ще Ви отговорят, че няма такава процедура. Но тогава ще получите и отговор от Tesla на предишното Ви запитване за възстановяване. Понякога двата отговора идват в един и същи ден, през няколко часа, след месец мълчание :)
Искам да питам!
Ако имате въпроси и мислите, че мога да Ви бъда полезен – можете да ми пишете в Twitter/X.
Ако смятате, че информацията Ви е била полезна – можете да поръчате автомобил, като използвате моя референтен код. При описаната ситуация Тесла подариха бонус точки и на купувача и на рефериралия го! :)
По изключение тази статия е под CC BY-NC-ND 4.0 DEED лиценз.
I have already lost my colors when moving to Lion on my Terminal.app, the same happened when I moved to Mountain Lion, but oh surprise, the fix I found out for Lion didn’t work for Mountain Lion, because in Mountain Lion there is no xterm-color available as a choice of terminal type. The solution I found was to manually edit the configuration options of Terminal.app and so far it seems to work.
You will need (most probably) XCode installed in order to edit the config file which is a plist. You can find the config file in ~/Library/Preferences/com.apple.Terminal.plist. Since the ~/Library folder has been hidden since Lion, your best bet is to open up terminal and type:
open ~/Library/Preferences
which will open the Preferences folder in Finder and you can just find the config file and open it.
Before doing any edits you should quit Terminal, as it saves its settings on exit and it will override any changes you do.
To add the xterm-color option you’ll have to go to Root > Window Settings locate the name of your default theme (in my case that’s Pro) expand it and find the TerminalType key. Now just change the key to xterm-color, save the file and launch Terminal.
As I’ve always strived to automate my home, as much as I can. Although I can’t still turn the lights on and off, I’m capable of controlling my TV, my set-top-box and my multimedia PC with my iPhone. And the problem with the lights is not so much of “impossible” but rather I don’t feel like tearing down my laws to run cables. I actually managed to write an app for a friend to turn his garden lights on and off with his iPhone.
For that purpose, having my TV remote is essential! Unfortunately, after I upgraded my iPhone 3Gs to 4s, the Samsung Remote app started crashing on each launch. Here’s how I managed to get it working:
- Turn off Wi-Fi and cellular data
- Start Samsung TV
- Go into Demo Play
- Turn back on your Wi-Fi
- Hit refresh
- Select a TV from the list
Since WordPress updated their iOS app to include location for posts, it came to my attention that it is fairly easy to add location to your posts – and it works nicely with the “Quick Photo” feature of the iOS WordPress app.
Unfortunately after I installed the WordPress GeoLocation plugin OnSwipe’s iPad theme stopped working for me. After some digging it turned out it is because Geolocation is overwriting the default alias of $ of jQuery which was breaking OnSwipe.
Here is how to fix that:
- Go to your admin panel
- Go to Plugins -> Editor
- In the drop-down Select plugin to edit choose “Geolocation”
- From the file list Plugin Files (just underneath the drop-down) select geolocation/geolocation.php
- Find in the code the function add_google_maps (use your browser’s search function and look for “function add_google_maps”)
- Find the line that reads:
var $j = jQuery.noConflict();either comment it out by prepending two slashes in front of it or delete it - In its place add the following:
$j = jQuery; - Click Update File
This should fix OnSwipe and at the same time allow your visitor to view the location tag of your posts!
Ubuntu 11.10 is out! So the package manager prompted me to upgrade from Ubuntu 11.04 and so I did. The upgrade process took several hours, but mainly because I wasn’t paying attention and I didn’t take immediate action of different prompts regarding the upgrade process.
I decided to keep all of my config file modifications hoping that would give me less headache at the end. Nevertheless, I got several problems after I booted in my new shiny Oneric Ocelot (Ubuntu 11.10’s codename).
- I couldn’t go past the login screen – the solution was simple – for some reason my ~/.Xauthority file was owned by root:root – I simply deleted the file and that fixed it
- I didn’t get any sound in Unity, but only in Unity as it turns out, as aplay was playing sound just fine. The sound preferences’ Hardware tab was also completely empty. I deleted the ~/.pulse folder and re-logged and I could re-configure my sound. Sound was back on!
When I upgraded to Lion suddenly my colorful SSH prompts on remote linux machines became dull and black and white. It took me some time to figure out what was going out, so at first I edited my Ubuntu .bashrc file and uncommented force_color_prompt=yes. But this didn’t seem right. So after some digging I found the problem – in Snow Leopard Terminal.app by default was identifying itself as xterm-color, but now in Lion it is xterm-256color, which the remote Ubuntu did not recognize. So to fix it without changing anything on the remote machines, do the following:
- Open Terminal.app Preferences
- Go to the Settings tab
- In your default theme go to the Advanced tab
- On the first line Declare terminal as: select xterm-color, instead of the default xterm-256color
- Reopen Terminal.app and voilà – the colored SSH command prompt is back!

Честит празник (на патерица) на всички, които могат да прочетат това.
От няколко години насам, по случай 24 май, много се чепка темата за кирилицата, шльокавицата и произвдните им азбуки, които средностатистическия българин употребява.
“Младите”, които използват компютри са упреквани, че си развалят езика и нямат правопис. Често се набедяват популярните програми – фейсбук, скайп (я вижте как хубаво изглеждат тия търговски марки написани на кирилица) и т.н.. Но дали те са причината?
Определено не!
И двата софтуера имат “меню на български”. А именно “менюто на български” е причината да пишем на латиница. Разгледайте обявите за телефони от преди няколко години – като част от “екстрите” на телефоните неотменно присъства “меню на български”. В 2011 почти всички телефони имат въпросното меню и способ да се пише на кирилица, но до преди няколко години това определено не беше така.
Същото се отнася и за компютрите – голяма част от софтуерните програми нямат “меню на български”, а до преди излизането на Уиндоус Виста, дори и сносна кирилица нямаше! Тази по БДС не се брои! Защо? Ами защото за някой, който тепърва започва да работи с компютър не може да намери БДС еквивалента на клавиатурата, защо такъв няма, защото държавата е допуснала да се продава в рамките на държавата продукт, който не отговаря на националните изисквания, а именно – не поддържа националния стандарт за клавиатурна подредба с обозначение на клавишите на кирилица. От тук всеки започва да ползва подредбата ЯВЕРТЪ – тук поне буквите ги има, а тази подредба я има поне от края на 80-те години! Т.е. проблема с БДС подредбата на клавиатурата не е от вчера. И така хем няма клавиатура с БДС, хем няма фонетична подредба в най-масовата операционна система! От там, започва да се ползва и латинската азбука за писане на български.
От скоро имаме и фонетична подредба, заложена системно в по-новите версии на уиндоус, но това не означава, че навика отмира трудно – даже напротив. В един момент започва да става дразнещо да превключваш от кирилица на латиница и обратно. А това се налага често, понеже всички интернет адреси са на латиница!
Заключенията, кой е виновен за слабата грамотност оставям на вас.
Извинете ме за правописните грешки, но за мен езика е средство, а не самоцел.
It took me two days to figure out how to initialize a new child record from within the parent model, I hope this helps someone:
I’m using devise for authentication and authorization and using devise built-in controllers. My User model has a child Contact model (Contact belongs_to :User) which contains the user’s names and contact information. I preferred not to initialize the content model on new registration in the view (what’s the point of MVC philosophy if you don’t follow it?).
The solution (in Ruby on Rails 2.3.11) is the after_initialize callback”
class User < ActiveRecord::Base
  has_one :contact, :dependent => :destroy
  accepts_nested_attributes_for :contact, :allow_destroy => true

  # Devise modules will go here

  attr_accessible :contact_attributes

  def after_initialize
    self.build_contact if self.contact.nil?
  end
end
and voilà! Your Contact model will be initialized and thus shown in the view when you use f.fields_for :contact
Merry Christmas from Puffy – the destroyer of worlds!

In my line of work as a web designer/developer I’ve learned to silently detest Internet Explorer, especially version 6, so today I decided to check out the analytics of my web sites, how much of the visitors would I be cutting off if I decide to drop IE6 support for the future. I checked several sites – totally different audience, markets, etc. All showed about the same result – 7% of all total visitors were using IE6, and IE6 was the least used of the IE family. Except for one site which had about 9.6%, but it was targeted at the wider Bulgaria population – demographics that I presume has mostly outdated hardware running XP’s.
I was delighted to see kirichkov.com’s demographics – IE was third, after Firefox and Chrome, with just about 11%! IE6 accounts for just 1.5% of the visits! Yes! This site looks awful in IE6, and NO! I don’t care, if you’re visiting with IE6 you’ll see a friendly greeting informing you that kirichkov.com does not support IE6 and the visitor should upgrade! Also the dominant OS of the visitor is … Linux! Even more joy for my web designer heart! But then again I’m not really surprised, given that 65% of the visits start at my article for ZoneMinder on Ubuntu 10.04!
I surely hope that sometime soon I can get back to my ZoneMinder project and present to you part 2 of the series that will turn the video server into a CCTV terminal!